- Contact Us
- +91-98111-55335
- [email protected]

Drone Based Measurement And Drones’ Certification
May 30, 2020
Guidelines For Manufacturing Remotely Piloted Aircraft Systems In India
May 30, 2020DIY: Smart Water Meter To Help Control Water Wastage
Increasing water consumption and wastage is leading to water scarcity. While a large population has no safe  drinking water, some people use a lot of water on daily basis and waste it.
This project is of a smart water meter that measures our daily water usage and feeds live data on our phone that is connected to a database, which can be accessed by the concerned authorities through a web browser.
Some components required for the project are:
• Water flow sensor (FS400A is recommended).
• Arduino Pro Mini
• Bluetooth HC-05
• Programmer (Arduino Uno/FTDI USB-UART adaptor)
• OLED SSD1306
• Water pipe (size as per flow meter inlet diameter)
• Water tap connector
To start the project, download the flow meter library from the link https://github.com/sekdiy/FlowMeter. Unzip the FlowMeter-master folder and paste it in the libraries folder of Arduino IDE. After that, open multi.ino file from FlowMeter-master folder and save it as water_meter.ino.
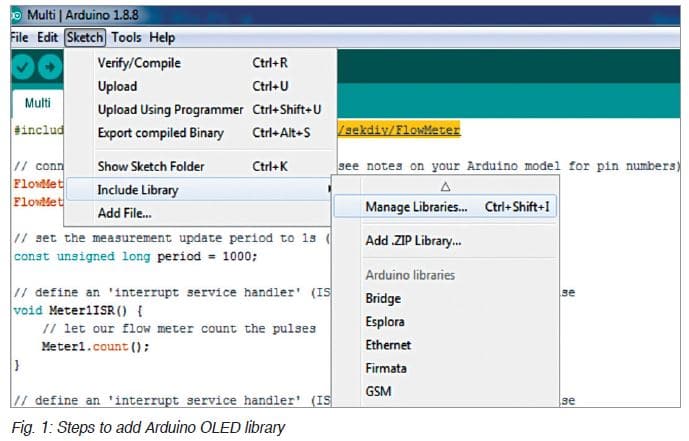
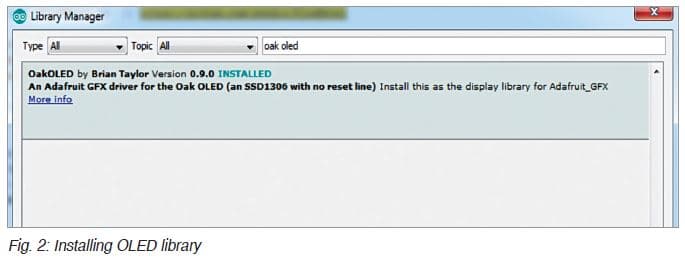
We need to include some additional features in this code by adding some libraries and modifying the code. To add libraries, click on Manage Libraries (refer Fig. 1) and search for OakOLED SSD 1306 library and install that library as shown in Fig. 2.
Now our Arduino IDE is ready. Let’s start the coding part.
Coding
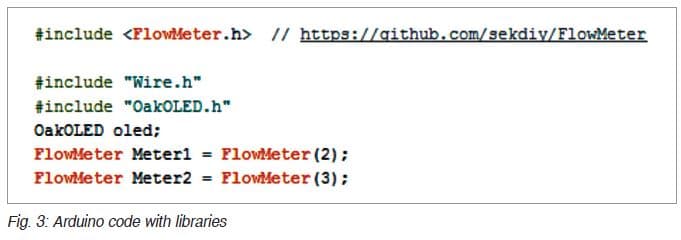
First, we need to include libraries in water_meter.ino code as shown in Fig. 3.
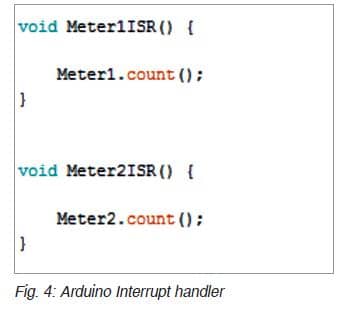
Next, create the interrupt handler for the sensor as shown in Fig. 4.
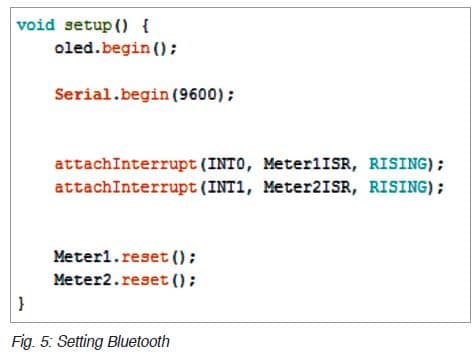
Here, we set up the Bluetooth with baud rate at 9600. If this baud rate does not work, try default baud rate at 4800.
Now, set the data output that will be sent to Bluetooth with Serial.print (data to send) function as shown in Fig. 6.
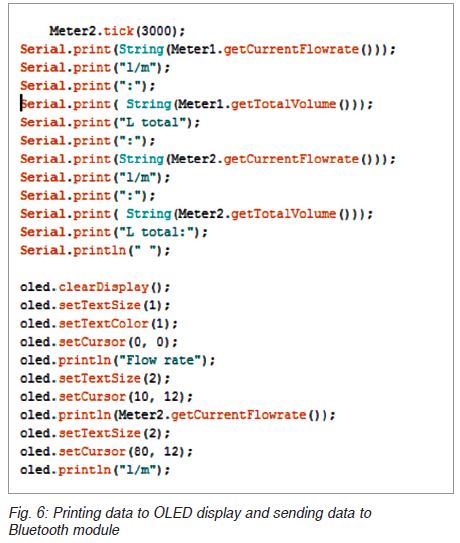
And at last, set OLED display with oled.println (data to send) function.
We have finished the coding part; now let’s start making an app using MIT App Inventor.
Android app development
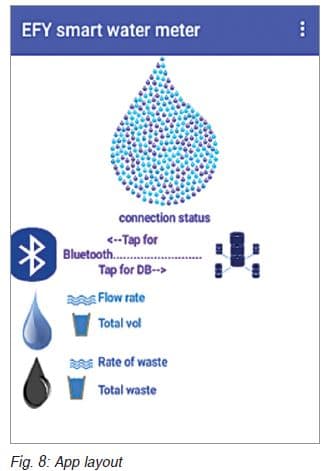
Open MIT App Inventor, make a layout and add the components as shown in Fig. 7.
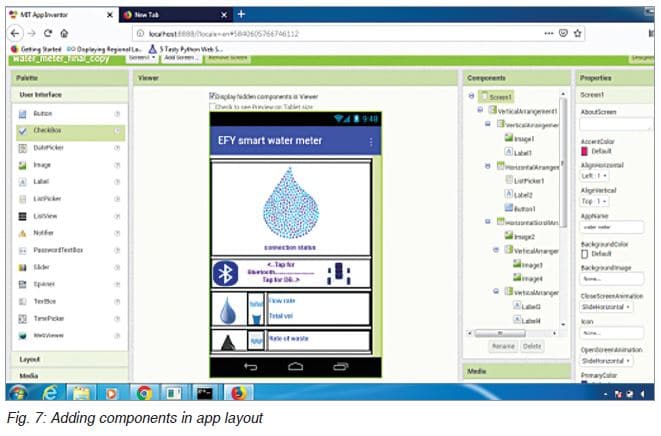
Main components added in the layout are:
• 1 x Button for database
• 5 x Text views for Bluetooth connection status, inlet water flow rate, the total volume of water consumed, wastewater flow rate, and total volume of water waste.
• TinyWebDB
• List picker for Bluetooth
• Bluetooth client
• Timer clock
The final app layout is shown in Fig. 8.
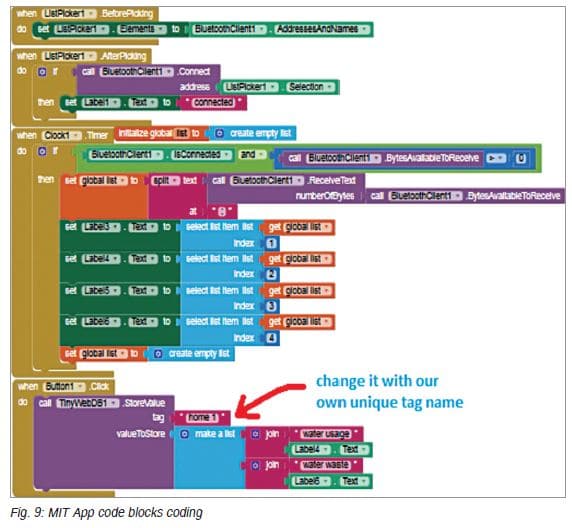
Now, go to MIT Code block and set the code as shown in Fig. 9. Save this code as smart_meter.aia and generate its .apk file. This .apk file needs to be installed on your Android smartphone.
Next, we need to upload the Arduino code to Arduino Pro Mini.
Note. Arduino Pro Mini was used in the prototype to make the project small and easy; you can also use Arduino Uno for this project. Code and connections remain the same for both.
Uploading code to Arduino Pro Mini
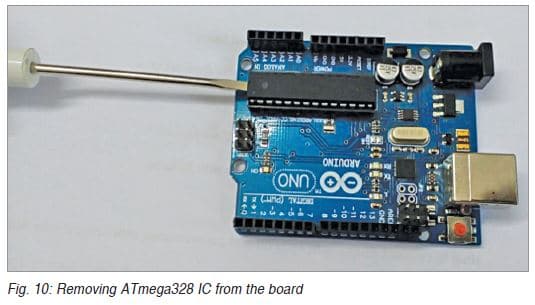
First, remove ATmega328 microcontroller from Arduino Uno board as shown in Fig. 10.
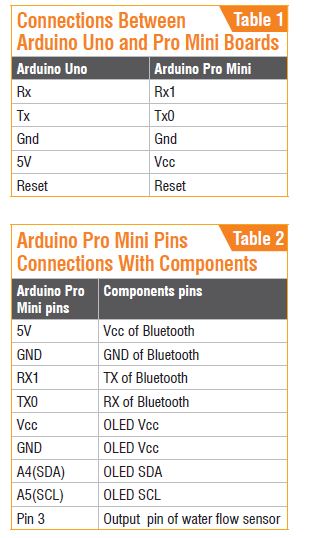
Connect Arduino Pro Mini with Arduino Uno as per Table 1.
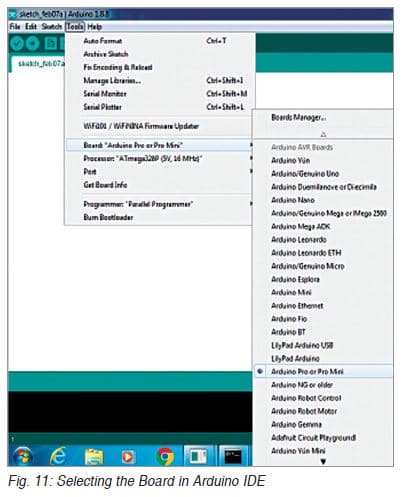
Now, go to Tools and select Board as Arduino Pro Mini and upload the code (water_meter.ino) to Arduino Pro Mini as shown in Fig. 11.
Next, we need to connect all the components to make the final smart water meter project.
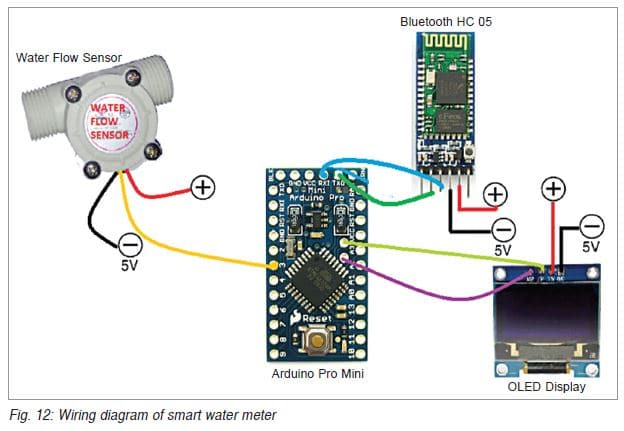
The Arduino Pro Mini pin connections with the components are given in Table 2. The actual wiring diagram of the Arduino Pro Mini pins with the components is shown in Fig. 12.
Now, cross-check all the connections. If all the connections are correct, then power the Arduino with a 5V DC power supply.
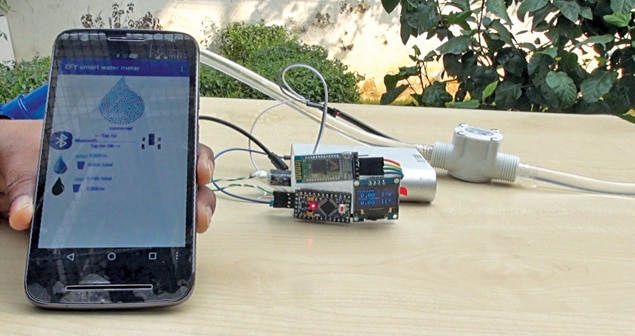
Connect the water sensor pipe to the water tap or water inlet of your water tank. You can see the total volume of water and water flow rate on the OLED display. Next, install the smart_meter.apk file on your Android device. Then, open smart_meter app and press on the Bluetooth icon.
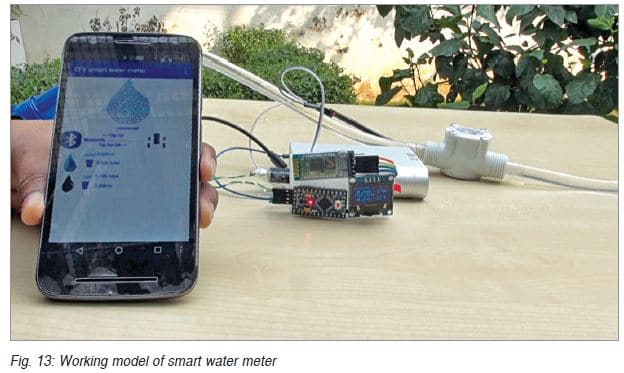
You will get a list of Bluetooth devices available near your Android phone. Select HC-05 from the list to pair it. The default code for pairing is 1234 (or could be 0000 or 1111). After connecting/pairing it, you will get the water flow rate and water volume consumed in the app on your phone as shown in Fig. 13. If there is a display problem or the data is incorrect, disconnect Bluetooth and connect it again.
You can tap on the DB icon to upload your water usage data to the Web server so that it can be seen from anywhere through the Internet.
Note. Internet Wi-Fi connection needs to be turned on in order to upload the data to the server.
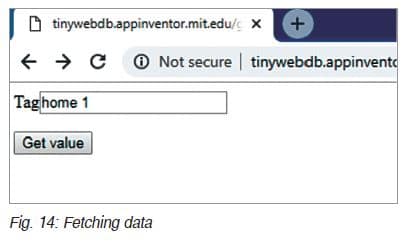
Now, to fetch the data, click on the link http://appinvtinywebdb.appspot.com/getvalue. Then type your house tag name as home 1, which is already mentioned in the app. Click on Get Value button to get the details of water usage as shown in Fig. 14.
Cheers! We have made the wonderful solution that can help us control water wastage.
You can add an extra flow sensor to pin 2 of Arduino for water wastage data from the sewer pipe outlet. It will work with the same code and app. So, use two sensors (one for water usage and another for waste water) and enjoy your project.
—Ashwini Kumar Sinha